How to install Tool-X in Termux

In This Guide, I will show How to install Tool-X in Termux.
What Is Tool-X?
Tool-X is a powerful tool that simplifies the installation of over 371 hacking tools on Termux. Developed for Android Termux, Tool-X eliminates the need to search and install Termux tools individually from various sources.
With Tool-X, you can install your preferred hacking tools for Termux with just a single click. Instead of manually navigating through GitHub or other websites to find and install each tool separately, Tool-X provides a centralized interface that lists all available hacking tools for Termux.
Once installed, Tool-X allows you to effortlessly choose and install the desired hacking tools, streamlining the process and saving you valuable time and effort.
Tool-X is available for?
Tool-X is available on the following operating systems.
- Android Termux
- Kali Linux
- Ubuntu
How to Install Tool-X in Termux?
Below is the procedure on how to install Tool-X in Termux.
1. Open Termux and then type the following command. The below command will update and upgrade your Termux.
pkg update && pkg upgrade -y
2. Now we need to install the git command to install Tool-X from Github. Just type the following command to install git.
pkg install git
3. Now we have to clone the Tool-X into our Termux by typing the following command.
git clone https://github.com/ekadanuarta/Tool-X.git
4. After successful cloning, we need to go to the Tool-X directory by using the following command.
cd Tool-X
5. After going into the Tool-X directory give read, write, and execute permission to the install.aex file that is present in the Tool-X directory. To do that type the following command.
chmod +x install
6. Now finally install the Tool-X by typing the following command.
sh install
If the above command gives an error then you can also type the below command.
./install
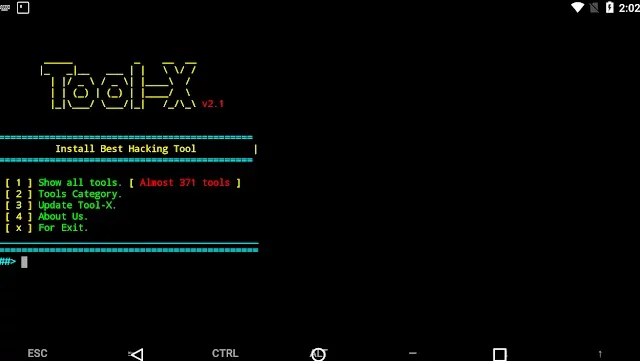
7. Now the Tool-X is successfully installed in your Termux. To run the Tool-X type the following command.
Tool-X
Now you can type Tool-X or toolx from anywhere from your Termux to run Tool-X.

How to use Tool-X?
1. First of all, open the Tool-X by typing the command Tool-X or toolx
2. To show the list of all available tools. Type 1 in Termux after opening the Tool-X.
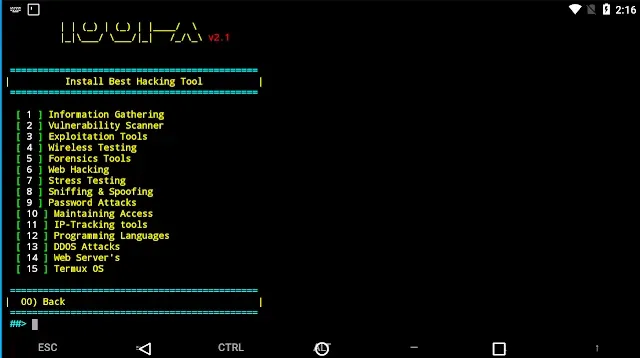
3. To show tools in the category, Type 2 in Termux to show Tools Category. After Typing 2 you will see the following category as shown in the below image.

4. To know about the creator of the tool type 4 in Termux.
5. To Exit type x.
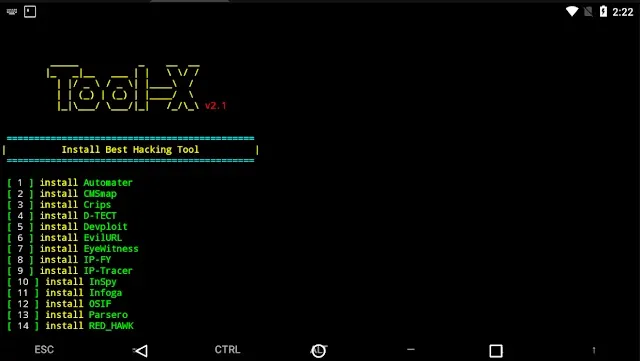
6. To install any tool using Tool-X you can type 1. After typing 1 you will see the list of all available tools for Termux. As shown in the below image. Now Just type the number on which your favorite tool is present. The tool will automatically start installing.

For example, I want to install IP-Tracker. The IP-Tracker is present on the 9th number. So I will type 9 in Termux to install IP-Tracker. After typing 9 the tool will automatically install the IP-Tracker into Termux.
You can also install any tool that you want by going into Tools Category.
If this article is helpful for you, Or you counter any error in installing the Tool-X then feel free to comment below.

Post a Comment